
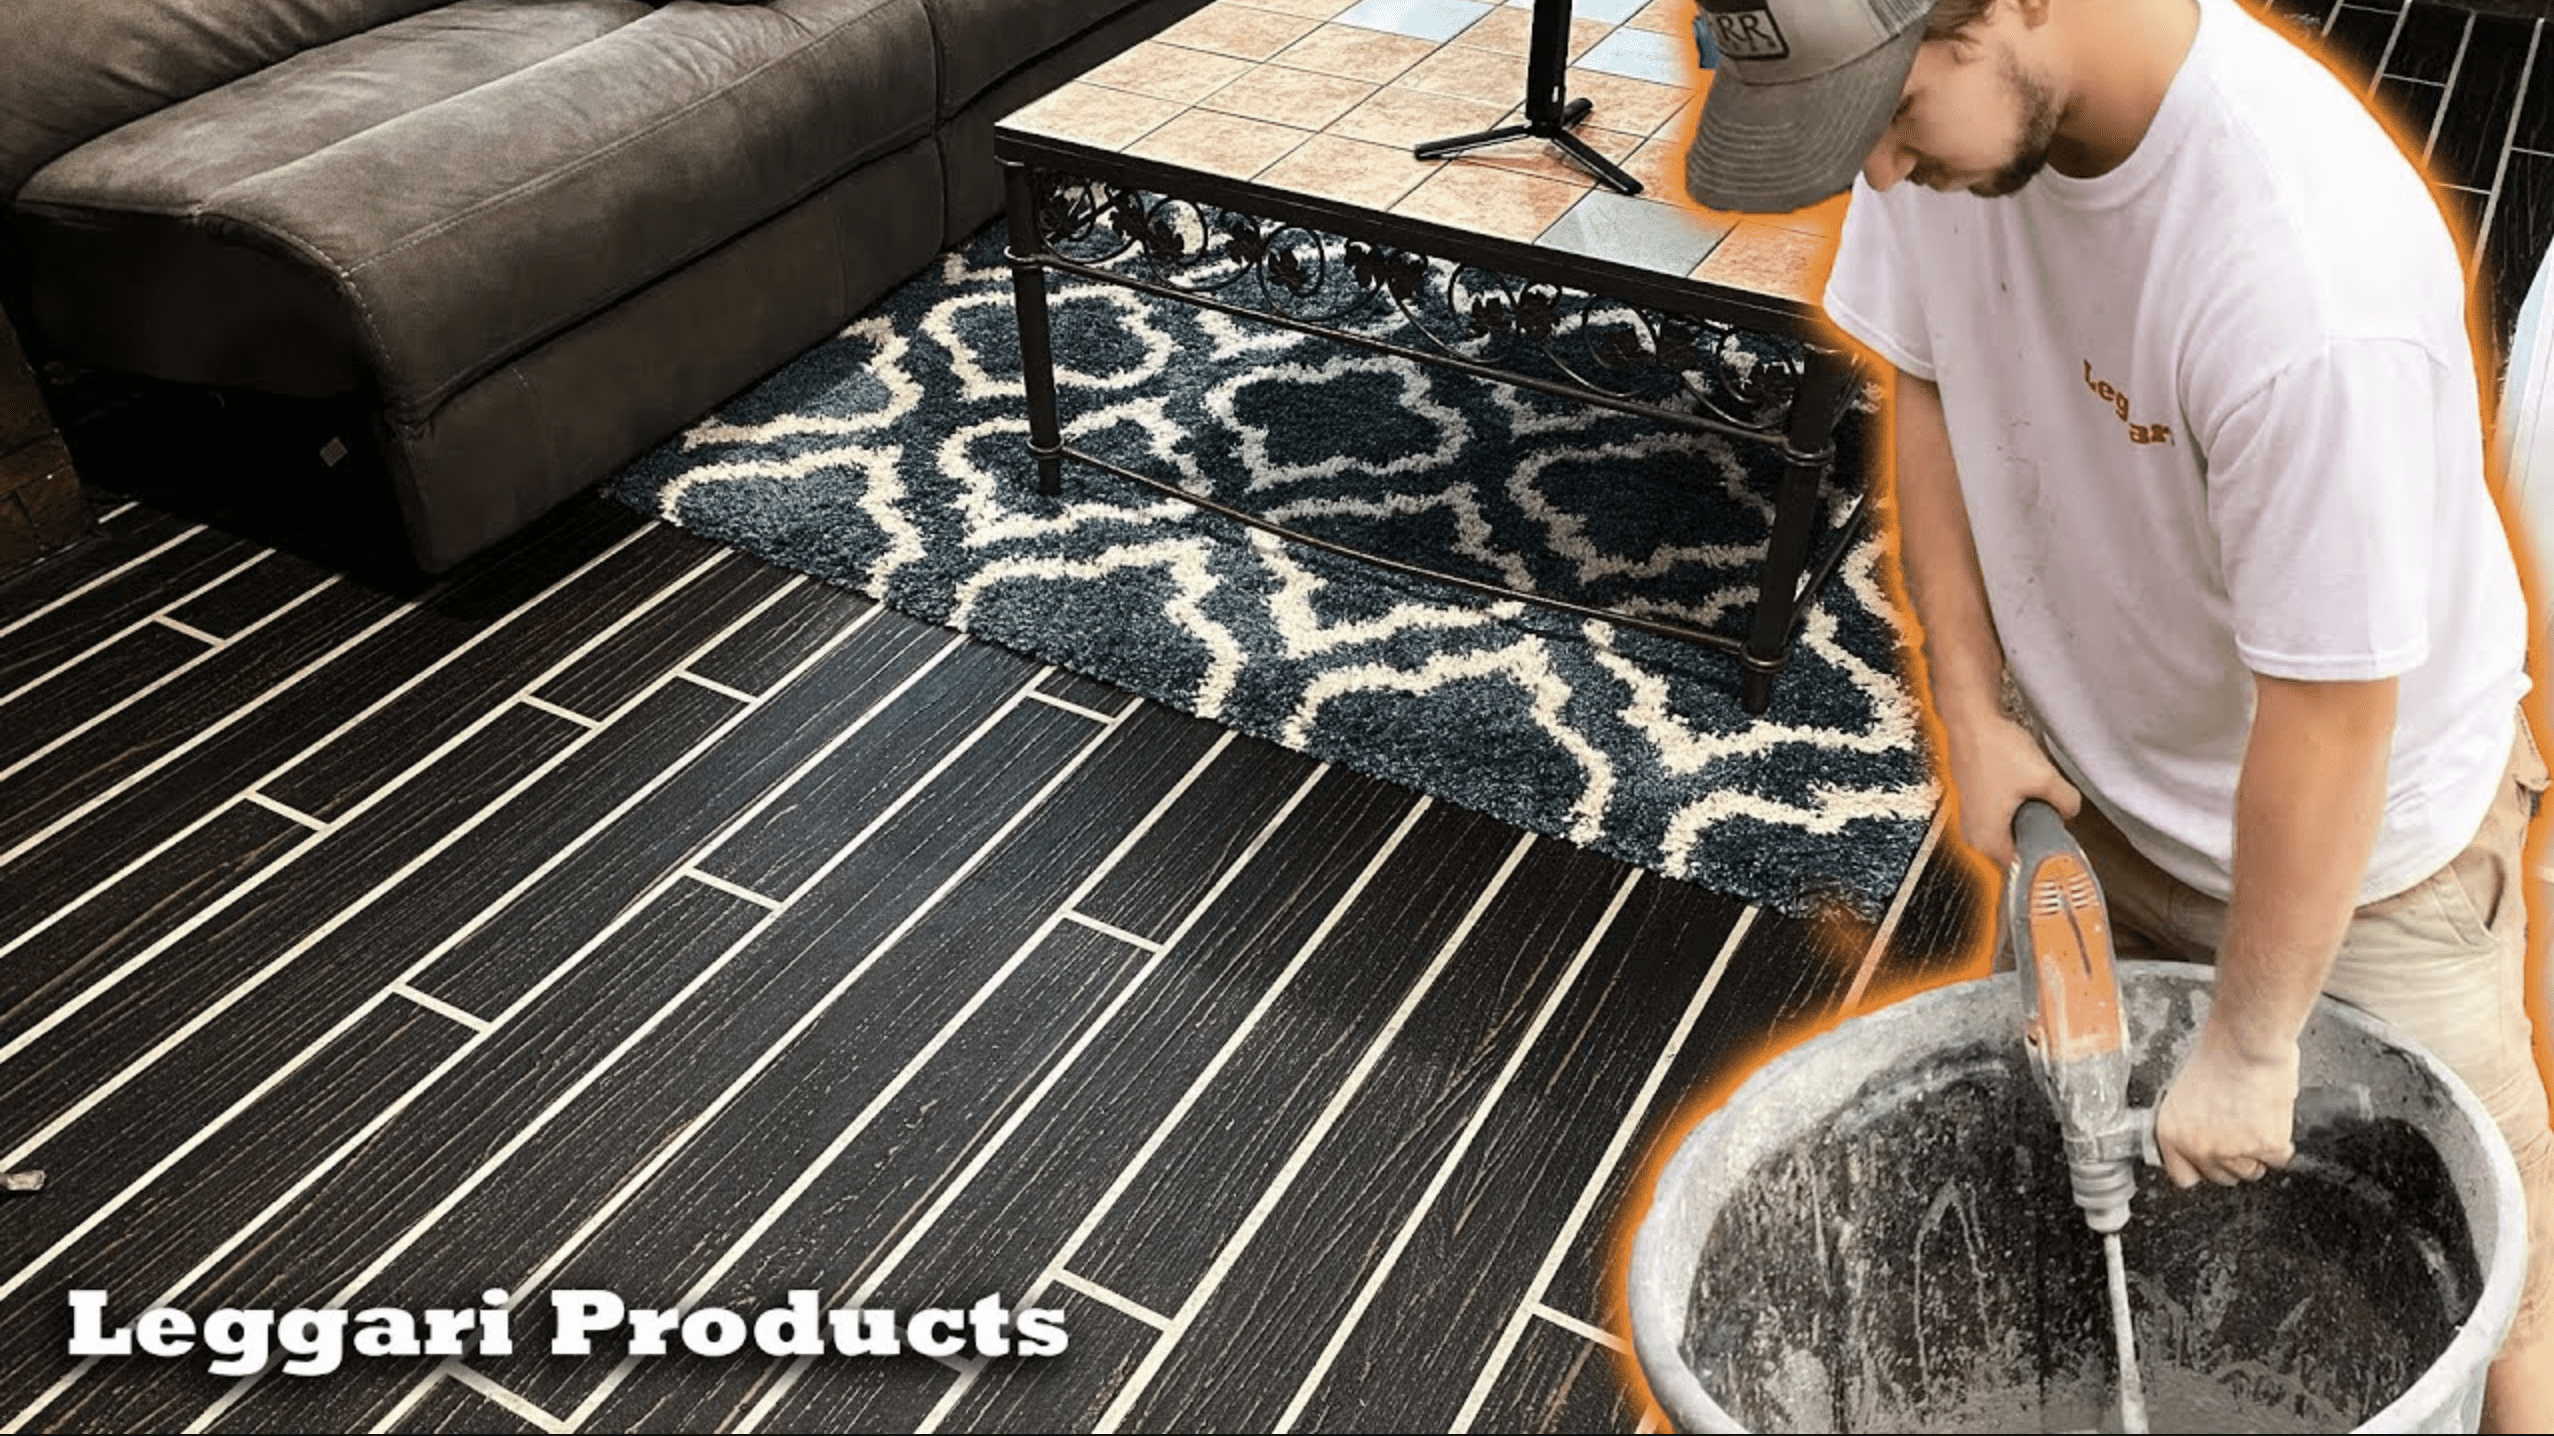
What if you could transform your basement into something that felt like a whole new space?
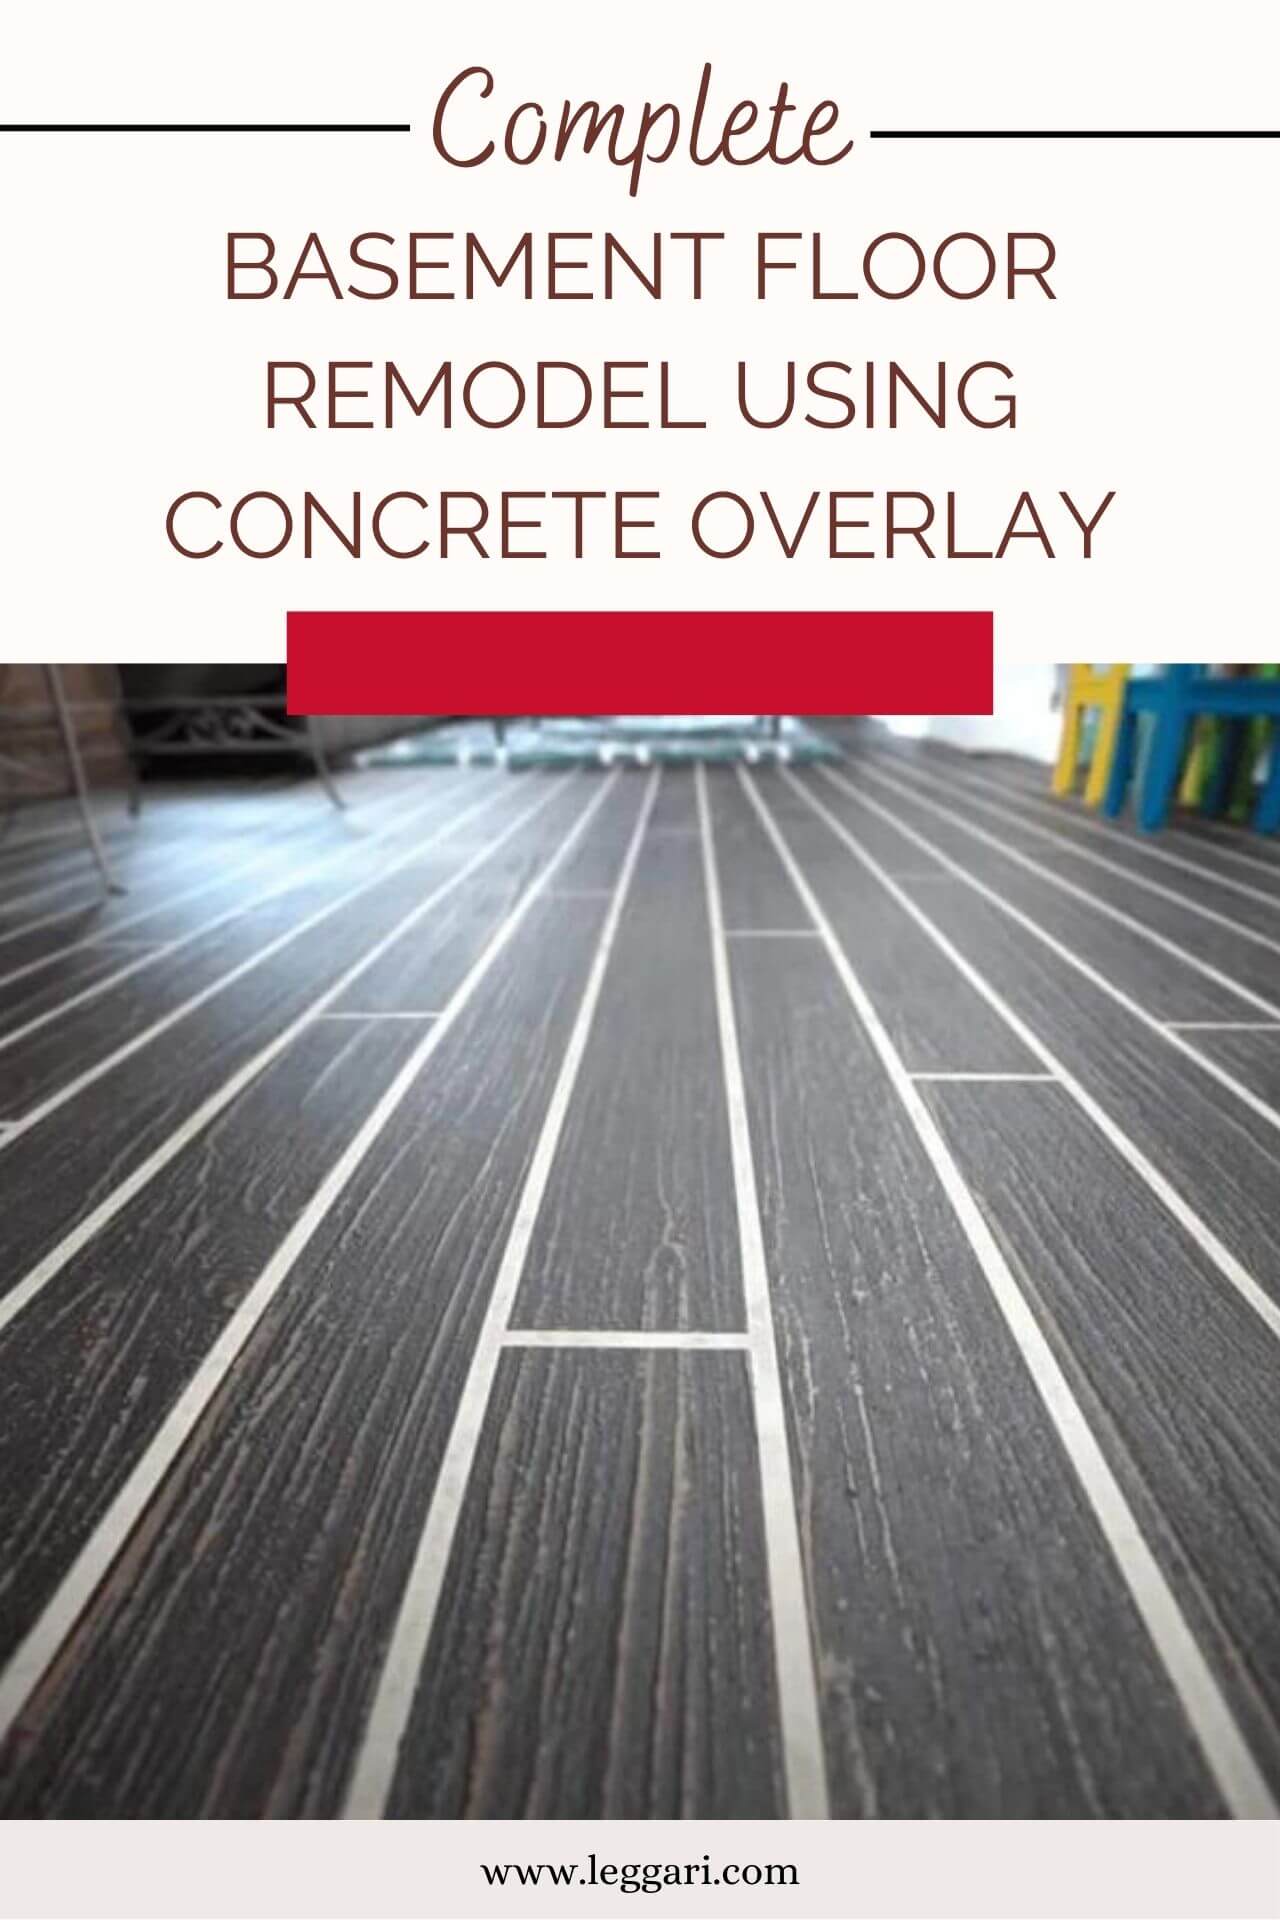
This article will show how one homeowner did just this by adding Leggari’s hardwood-look concrete overlay system. The transformation is incredible and gives this home’s downstairs a whole new, updated look!
Step 1: Prepping your floor
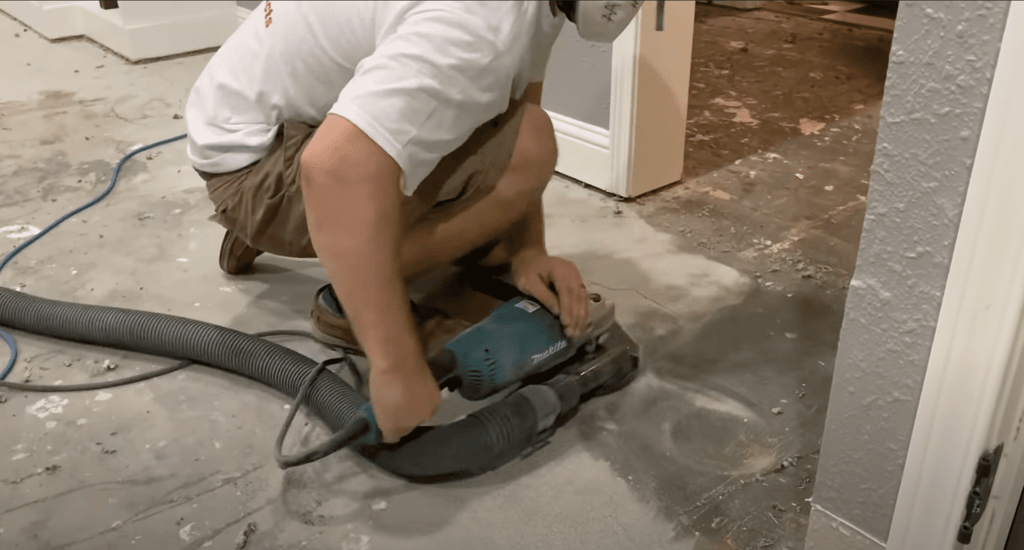
The first step of this project is to sand down the entire floor so that it’s equally level. This will ensure there are no raised areas where the carpet was previously installed and that there is no adhesive from the carpet still attached to the concrete.
Keep in mind that when working on projects, there are certain safety precautions to take. For example, if you’re doing this project indoors without any airflow, then wear a mask so as not to breathe all the dust created in this step!
Step 2: Mixing and Applying Texture Coat
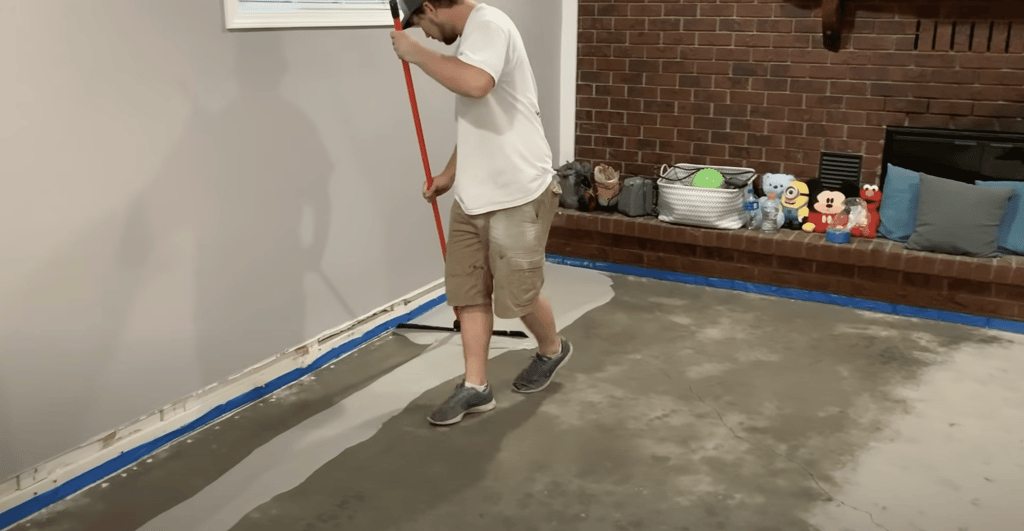
Before starting this next step, make sure to tape all of your edges. You don’t want to have any product on your walls, or other surfaces splashed on.
Anything that you wouldn’t want to stain, either move out of the way or wrap it with plastic to protect it.
After mixing your texture coat, you are ready to begin pouring the product, spreading an even layer on the whole floor.
Getting the edges can be tricky, so if you need to, grab a smaller squeegee and gently spread throughout all of the edges. We used this larger squeegee as shown in the image because we were working with an open floor.
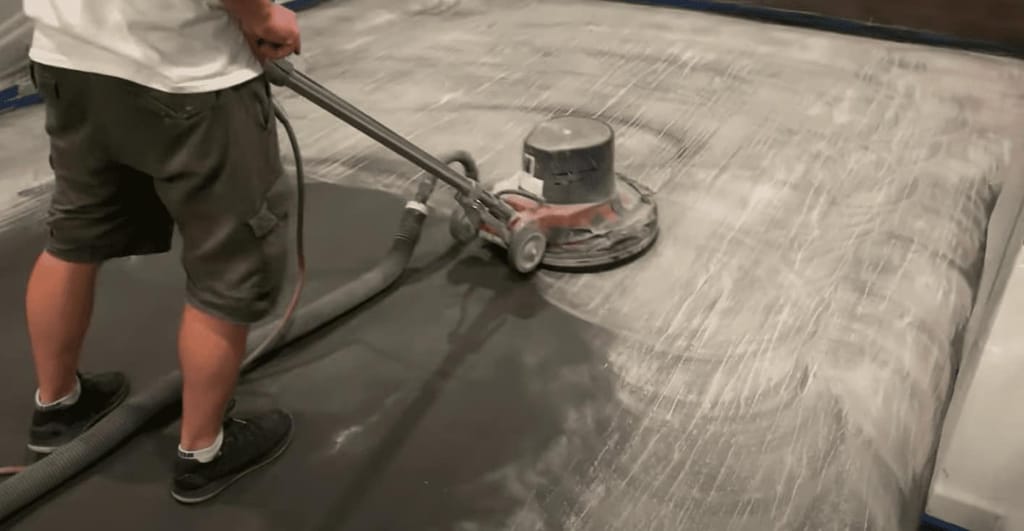
Step 3: Sanding the Floor
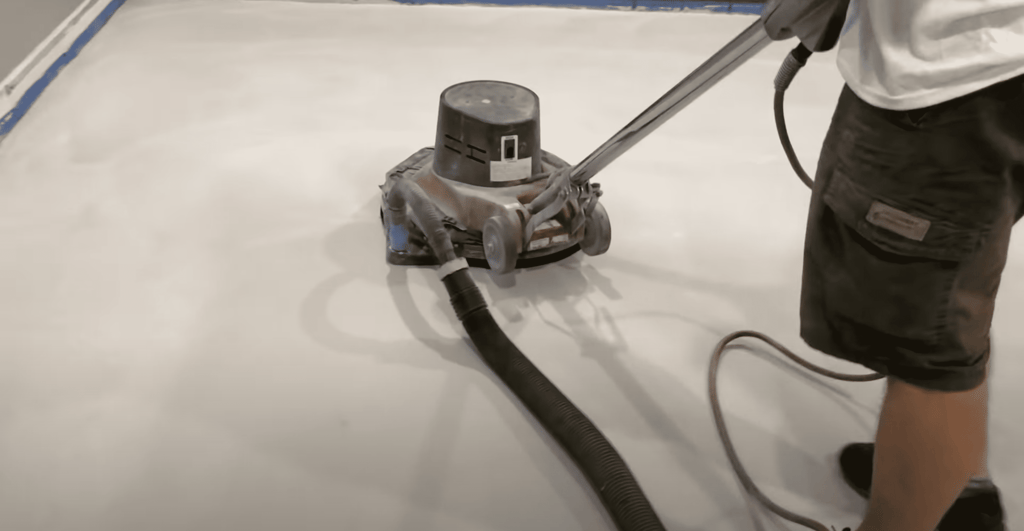
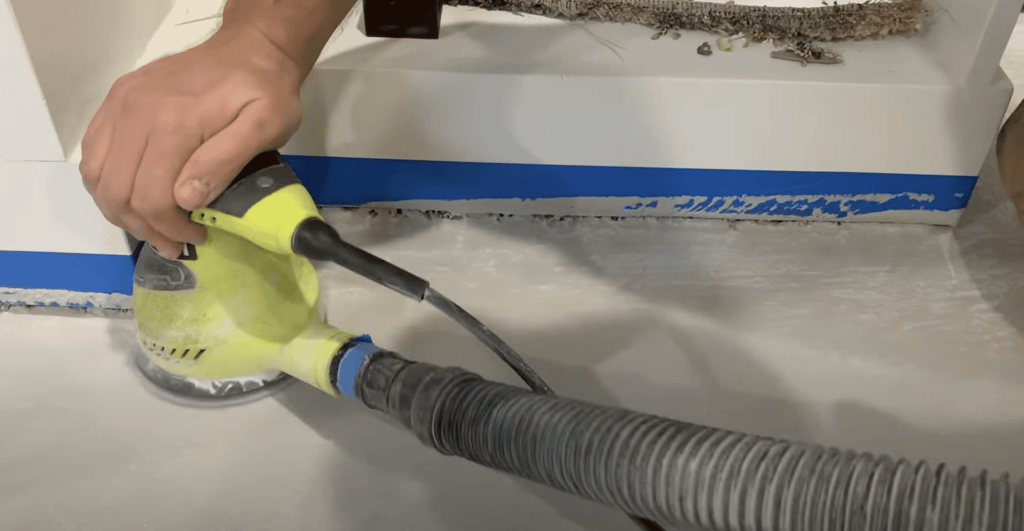
After this Texture Coat is all dried off, you are now ready to begin sanding down the floor.
We started with a giant sanding machine to cover most of the floor. We were getting the larger areas sanded. The entire floor must be completely sanded down; because the giant machine cannot cover the edges fully, we also used a much smaller sanding machine to ensure every inch of the floor is ready for the next step!
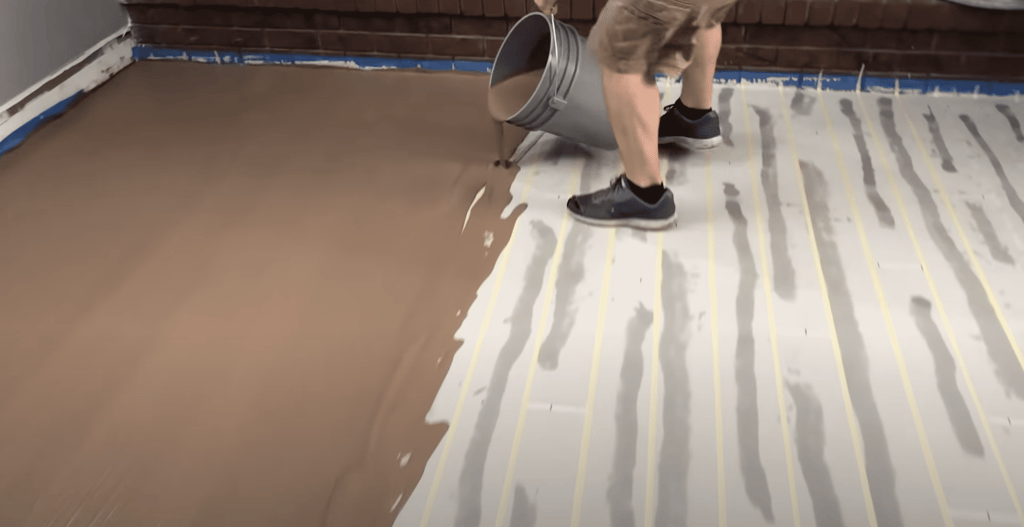
Step 4: Applying Scratch Coat
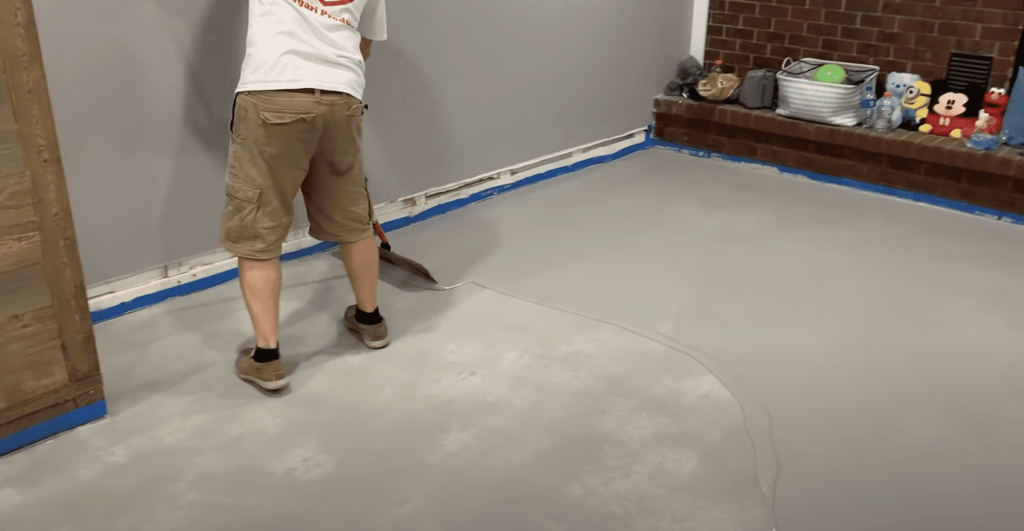
Applying a scratch coat is simply pouring it onto the floor, and once again, use a large squeegee to spread it throughout the floor.
You want to repeat the same technique you already did in step 2. It will be applied the same way that we applied our Texture Coat. The entire floor must be coated with this scratch coat.
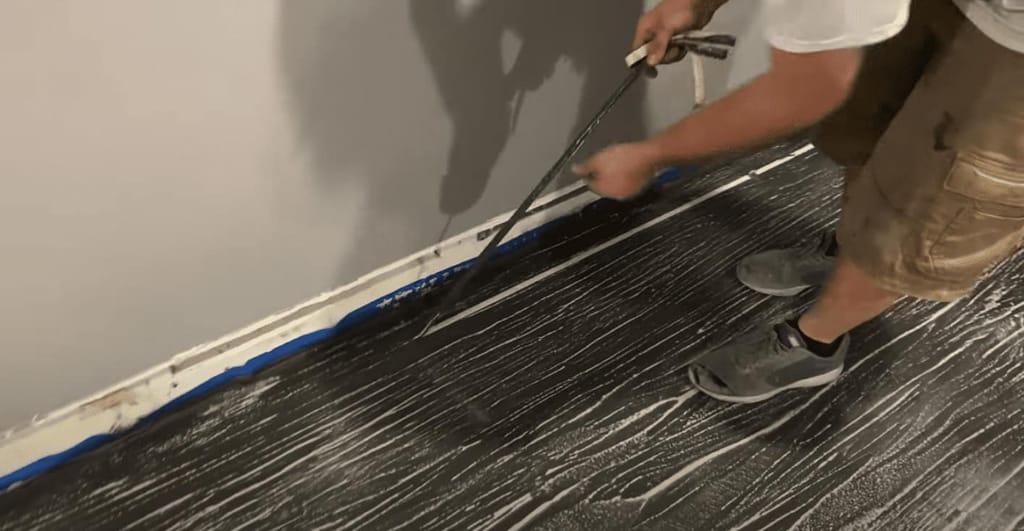
Step 5: Grout Lines & Hydrating
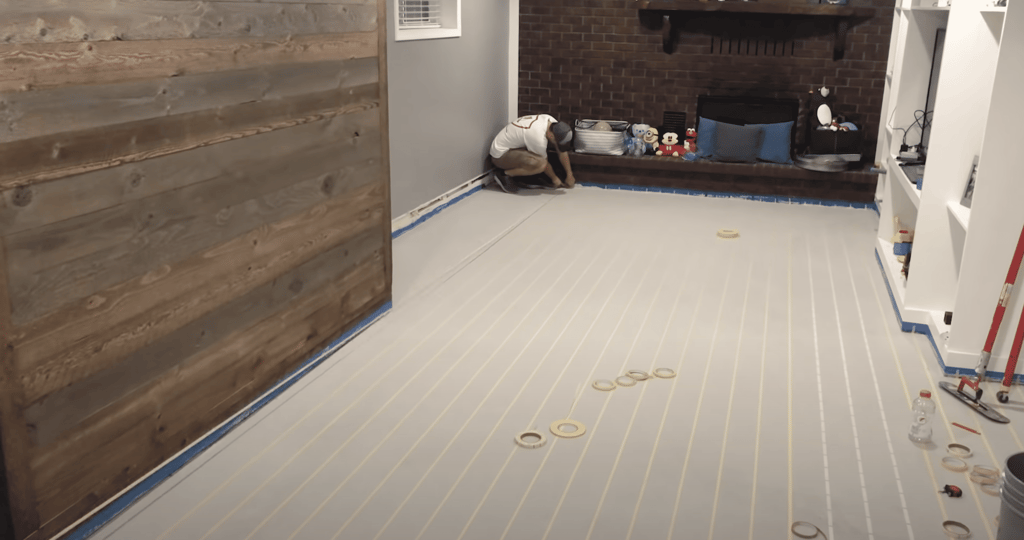
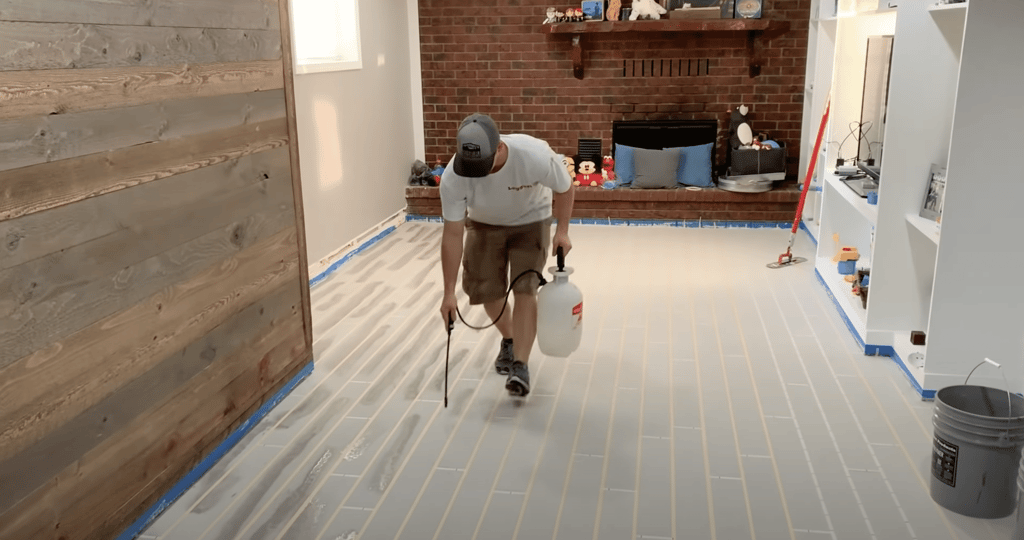
It is now time to grab all of the help you can get! Creating the grout lines is an essential part of this project. You want to make sure that you are creating equally symmetrical lines across your entire floor with your tape.
Although we used filament tape, we have found that it is the best tape for this kind of project; you are welcome to use any type of tape.
After doing this, the next step is to hydrate the floor. As you can see, we used a mister to hydrate our floor with water. Something to note is that immediately after hydrating your floor, the next step must begin; it is something to keep in mind before starting to hydrate.
We had everything ready for our next step before starting the hydrating process. This ensured that we could start the following action right away.
Step 6: Applying Texture Coat
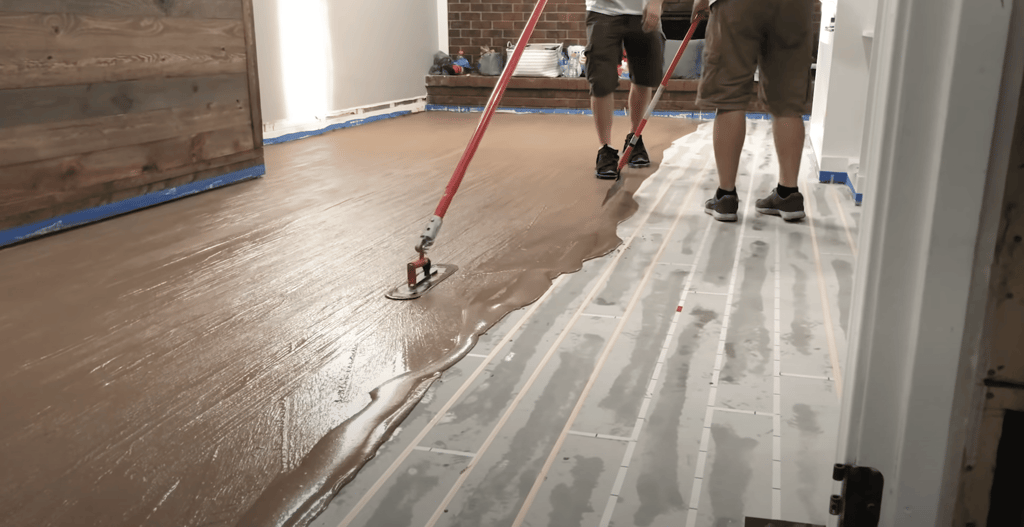
Applying the next Texture coat requires at least two people! While one of us is smoothing out the product with a squeegee, the next person immediately follows what we used to create the texture.
We took a pool trowel on a swivel attachment and connected it to a pole. This gives us the length we need to keep up with the person using the squeegee.
As you can see in the second image One of us is smoothing out the Texture Coat and the next is creating the actual texture.
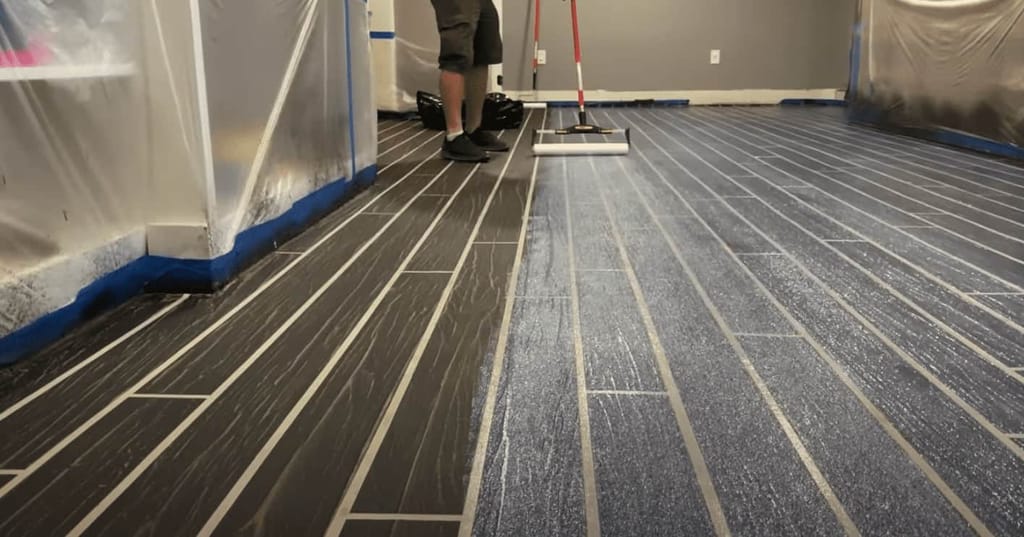
Step 7: Applying Stain
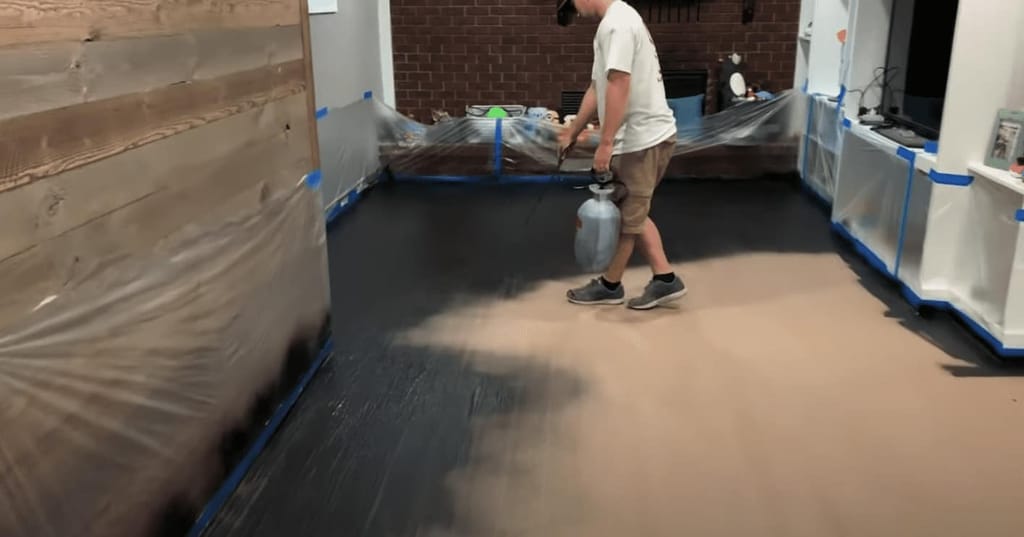
After completing the previous step, the next is to apply the stain. We used a mister in order to do this more efficiently. Evenly spray out the stain across the entire floor.
As you can see above we did use plastic wrap to completely seal more of the parts along the walls and different pieces of furniture.
This mister sprays out the stain and can definitely get on its surroundings so make sure to protect your unwanted stained areas!
Step 8: Sanding the floor & Pulling Tape
After applying the stain onto the entire floor, we were ready to begin the final sanding of the floor. So, again, we took our giant sanding machine and continued to do this until we were finished.
We also had to use our smaller sanding machine to ensure every inch of the floor was properly sanded down.
Next, we began pulling the tape that we had laid down to create the grout lines.
Step 9: Adding Urethane Coat
After properly mixing the urethane gloss coat. We took a paint roller and began to apply it.
We added an even layer across the floor. This completely seals the floor making them durable and having a beautiful finish!
You will repeat this process adding a second layer of Urethane gloss once again, ensuring that all of your hard work is being completely sealed.
The Leggari Hardwood Concrete Overlay System
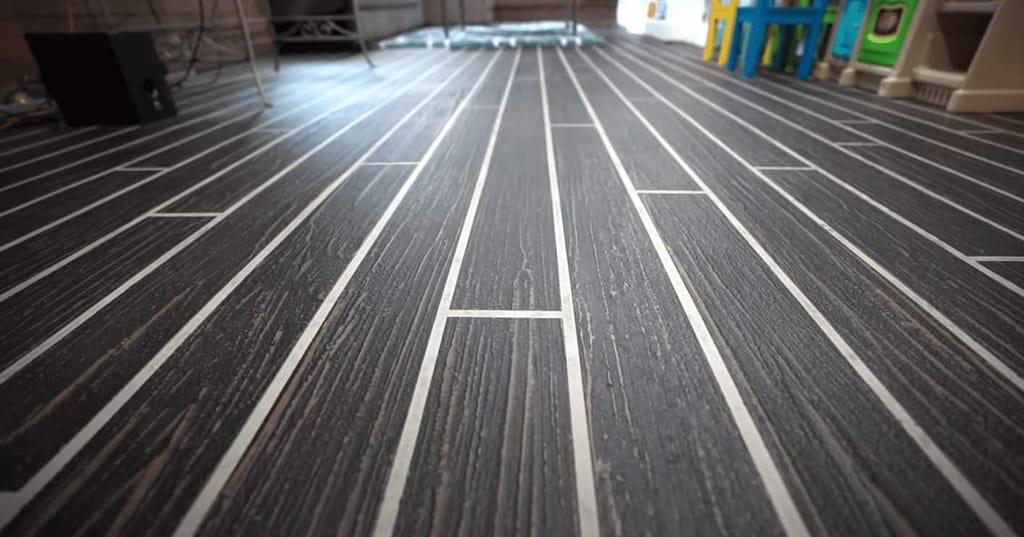
The final look is just what the homeowners envisioned!
At Leggari, we have simplified the processes in order to get these results. Anyone with little to no experience is able to tackle these projects and get amazing results just like this one!